
[ad_1]
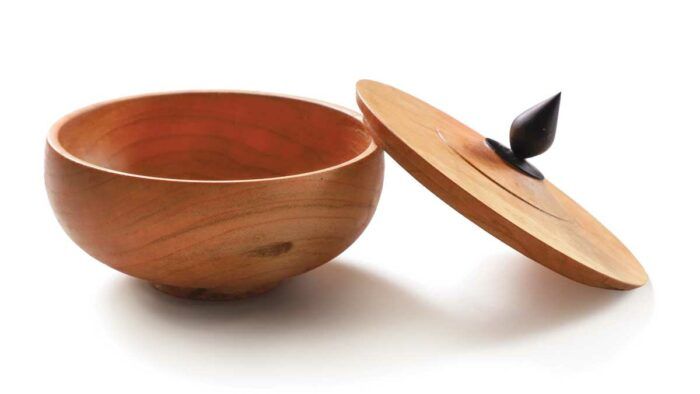
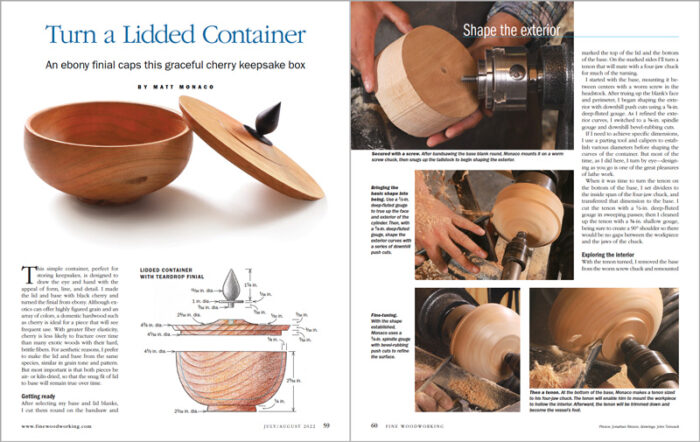
Synopsis: Matt Monaco selected cherry for this turned field as a result of he plans for it to be properly used, and cherry is each stunning and long-wearing. The ebony finial that tops the lid provides a dramatic contact. Right here, he covers shaping the surface and excavating the within, creating the foot, making the lid, and ending.
 This straightforward container, good for storing keepsakes, is designed to attract the attention and hand with the enchantment of type, line, and element. I made the lid and base with black cherry and turned the finial from ebony. Though exotics can supply extremely figured grain and an array of colours, a home hardwood resembling cherry is right for a chunk that can see frequent use. With better fiber elasticity, cherry is much less more likely to fracture over time than many unique woods with their laborious, brittle fibers. For aesthetic causes, I favor to make the lid and base from the identical species, comparable in grain tone and sample. However most essential is that each items be air- or kiln-dried, in order that the cosy match of lid to base will stay true over time.
Preparing
After deciding on my base and lid blanks, I minimize them spherical on the bandsaw and marked the highest of the lid and the underside of the bottom. On the marked sides I’ll flip a tenon that can mate with a four-jaw chuck for a lot of the turning.
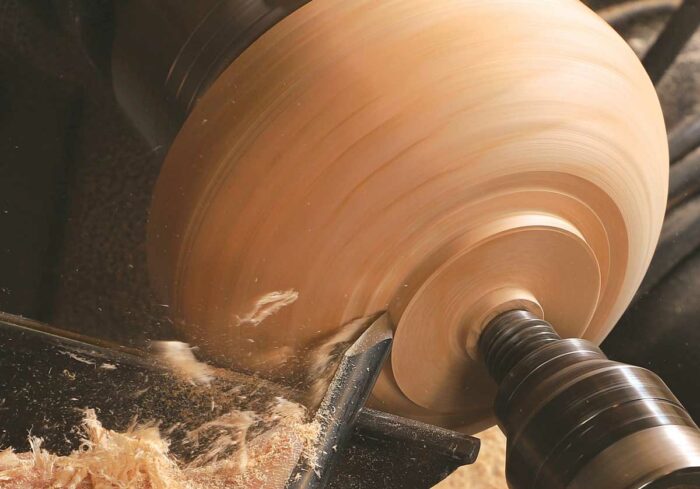
I began with the bottom, mounting it between facilities with a worm screw within the headstock. After truing up the clean’s face and perimeter, I started shaping the outside with downhill push cuts utilizing a 3⁄8-in. deep-fluted gouge. As I refined the outside curves, I switched to a 3⁄8-in. spindle gouge and downhill bevel-rubbing cuts.
If I would like to attain particular dimensions, I exploit a parting software and calipers to ascertain numerous diameters earlier than shaping the curves of the container. However more often than not, as I did right here, I flip by eye—designing as you go is among the nice pleasures of lathe work.
When it was time to show the tenon on the underside of the bottom, I set dividers to the within span of the four-jaw chuck, and transferred that dimension to the bottom. I minimize the tenon with a 1⁄2-in. deep-fluted gouge in sweeping passes; then I cleaned up the tenon with a 3⁄8-in. shallow gouge, being certain to create a 90° shoulder so there can be no gaps between the workpiece and the jaws of the chuck.
Share the inside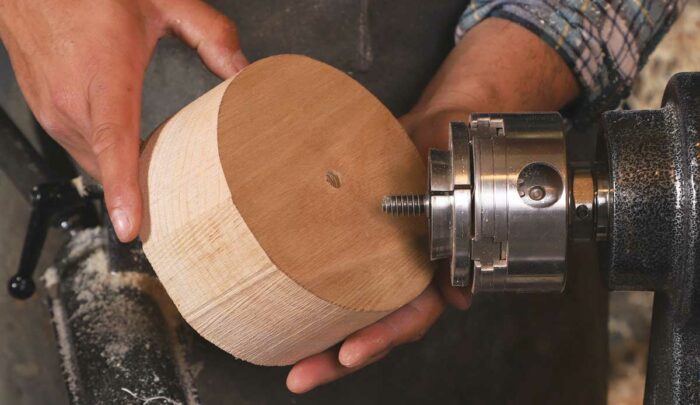 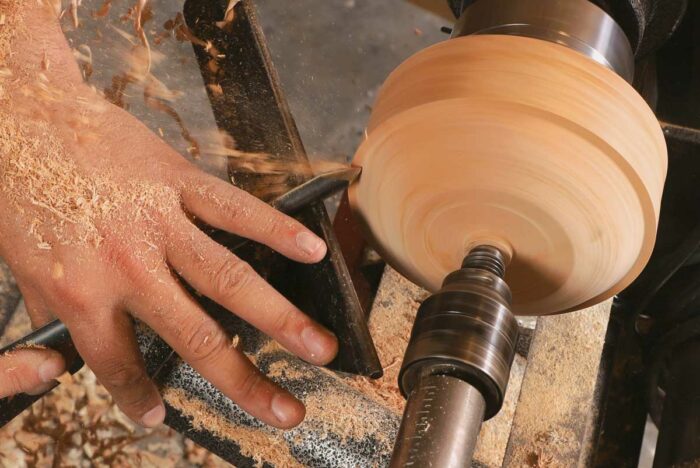 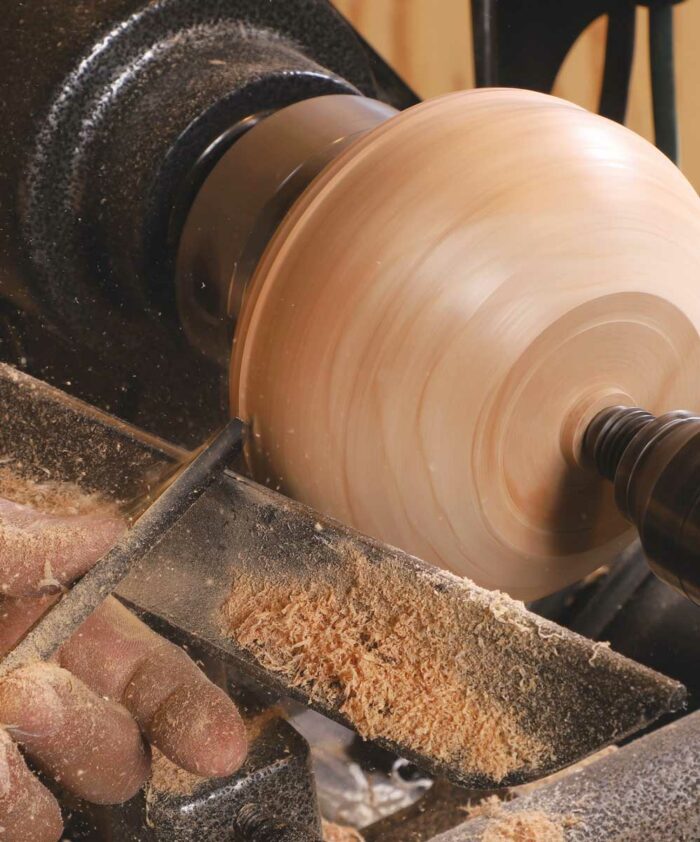
|
Exploring the inside
With the tenon turned, I eliminated the bottom from the worm screw chuck and remounted it, inserting the tenon within the four-jaw chuck. After truing the face, I drilled a depth gap into the middle of the clean. I wound tape onto the bit to make sure the opening stopped 1⁄4 in. shy of the chuck’s jaws.
Subsequent, utilizing a 1⁄2-in. deep-fluted gouge, I took hollowing passes towards the center of the container’s inside. As I enlarged the excavation, I made certain to retain a wall thickness of 1⁄2 in. or so. I continued refining the inside with 3⁄8-in. and 1⁄4-in. deep-fluted gouges, establishing the ultimate wall thickness with bevel-rubbing push cuts. Then I completed hollowing the inside by making end cuts with a 1⁄2-in. deep-fluted inside gouge, going simply barely past the depth of the opening I drilled.
 From Fine Woodworking #297
To view your complete article, please click on the View PDF button beneath.
 |
Flip a Lidded Canister |
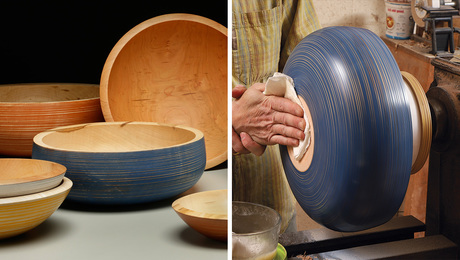 |
Add coloration and texture to a turned bowl |
 |
Sharpening Turning Instruments |
Obtain FREE PDF
[ad_2]