
[ad_1]
Synopsis: Wedge-shaped segments make up the veneer sample for this sunburst desk. The design lends itself to totally different numbers of segments, several types of wooden, and totally different sizes of tabletop. Bruce Eaton makes use of a foolproof methodology for tackling the angles of the wedges with out math, and takes benefit of templates to assist with the shaping. The veneering is simple, too.
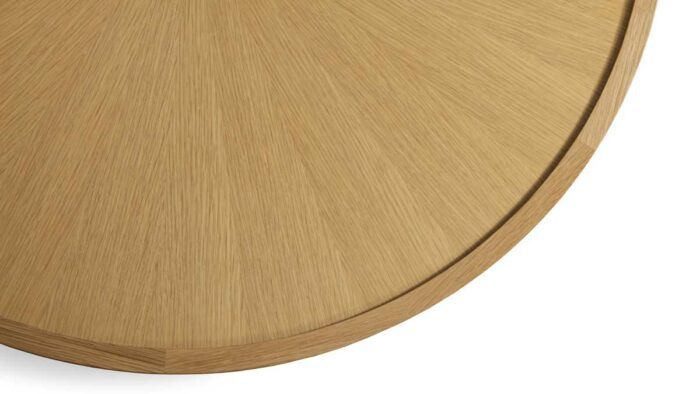
The few items of furnishings I’ve made for our dwelling have been comparatively easy and fast to construct. A few years in the past, we moved into a brand new dwelling and after a 12 months or so with no espresso desk, I made one primarily based loosely on Artwork Deco tables with radially matched veneer and raised edging (I describe how one can make the edging on this problem’s Grasp Class, pp. 74–80). Since making that first desk in black limba wooden, I’ve made a pair extra variations, refining my course of whereas testing out the look in cherry and in oak, which I’m utilizing right here.
Adaptability is likely one of the strengths of this sunburst design. You may range the variety of segments within the burst, the kind of wooden, and the diameter of the highest, whereas nonetheless making use of the strategies I describe on this article. Even in case you change the kind of burst sample—I take advantage of a radial burst—your strategy will want solely a slight tweak.
Drawing helps with angles
The veneer sample is constructed up from a bunch of wedge-shaped segments that make a circle, which implies angles—however don’t let that scare you. A tried-and-true methodology for tackling angles with out guesswork is to make use of a drawing. With one in hand, there’s no math concerned since you may simply set a bevel gauge to the drawing.
To start out, draw the tabletop on MDF or paper and use a compass to step off the segments across the perimeter. The highest veneer comes collectively in two half circles, so that you’re taking pictures for a fair variety of segments. To make them slim sufficient to suit throughout the width of my quartersawn veneer, I ended up with 26 segments. You might require a special variety of them.
Begin with the segments
I like to make use of quartersawn veneer with a constant grain. This lets me slip-match my segments for a radial burst. For those who book-match your veneer with matching grain at every joint, buy sufficient sheets (plus a pair additional) so you need to use the identical a part of every sheet for every section. With my desk’s slip-match and straight grain, matching is sort of assured.
My instrument package for creating the segments is minimal. To put them out, I take advantage of a wedge of plywood trimmed to their measurement. To chop them out, I seize a veneer noticed and a few vital helpers. First is a straightedge that retains my noticed in line and the veneer flat. Second is a backer board, which helps defend the underside face of the veneer.
Create the segments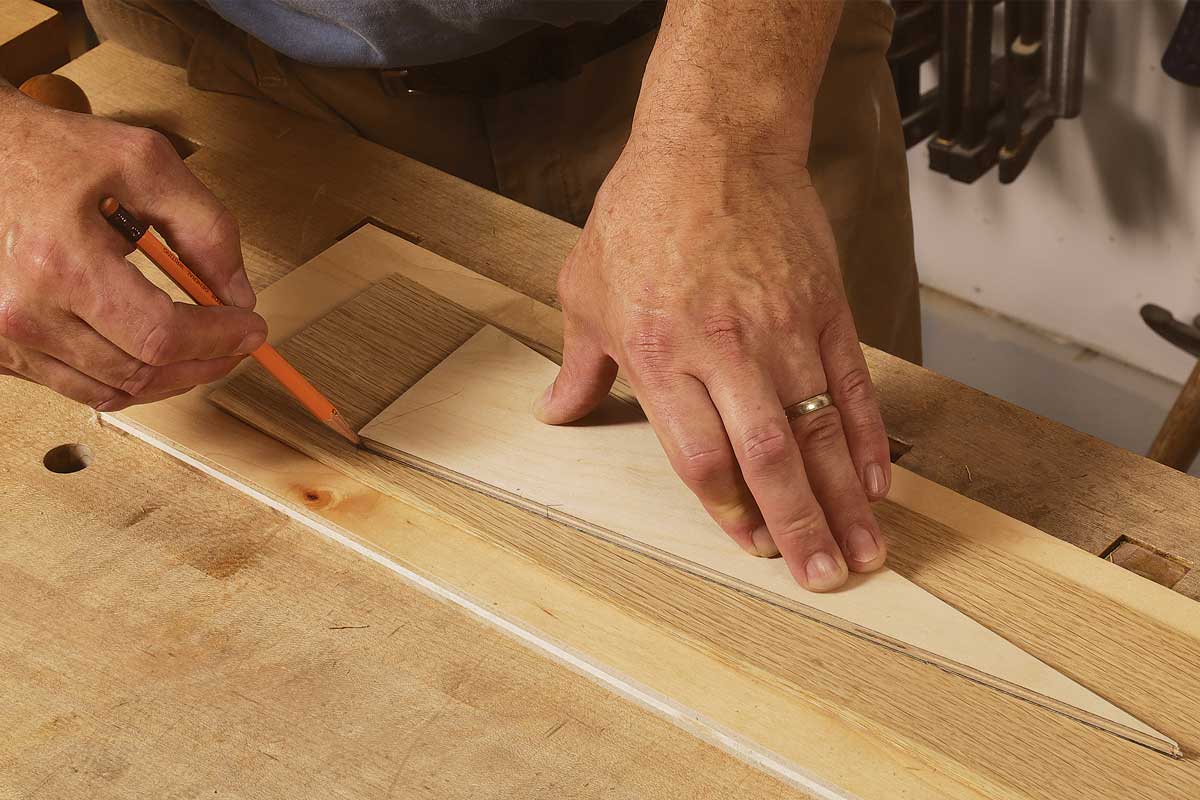 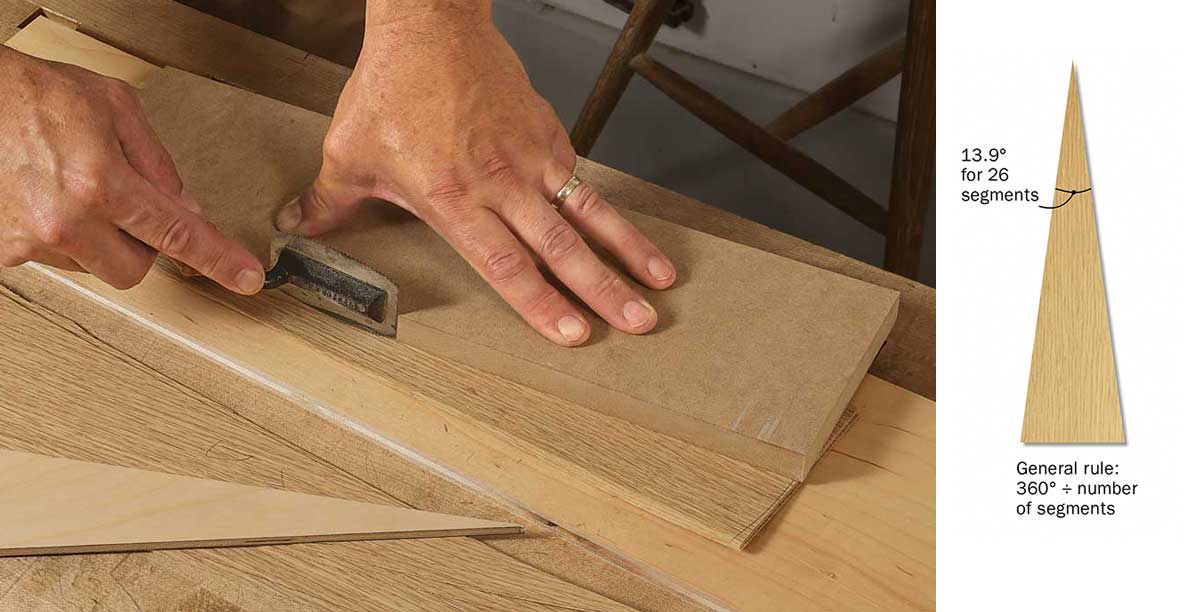 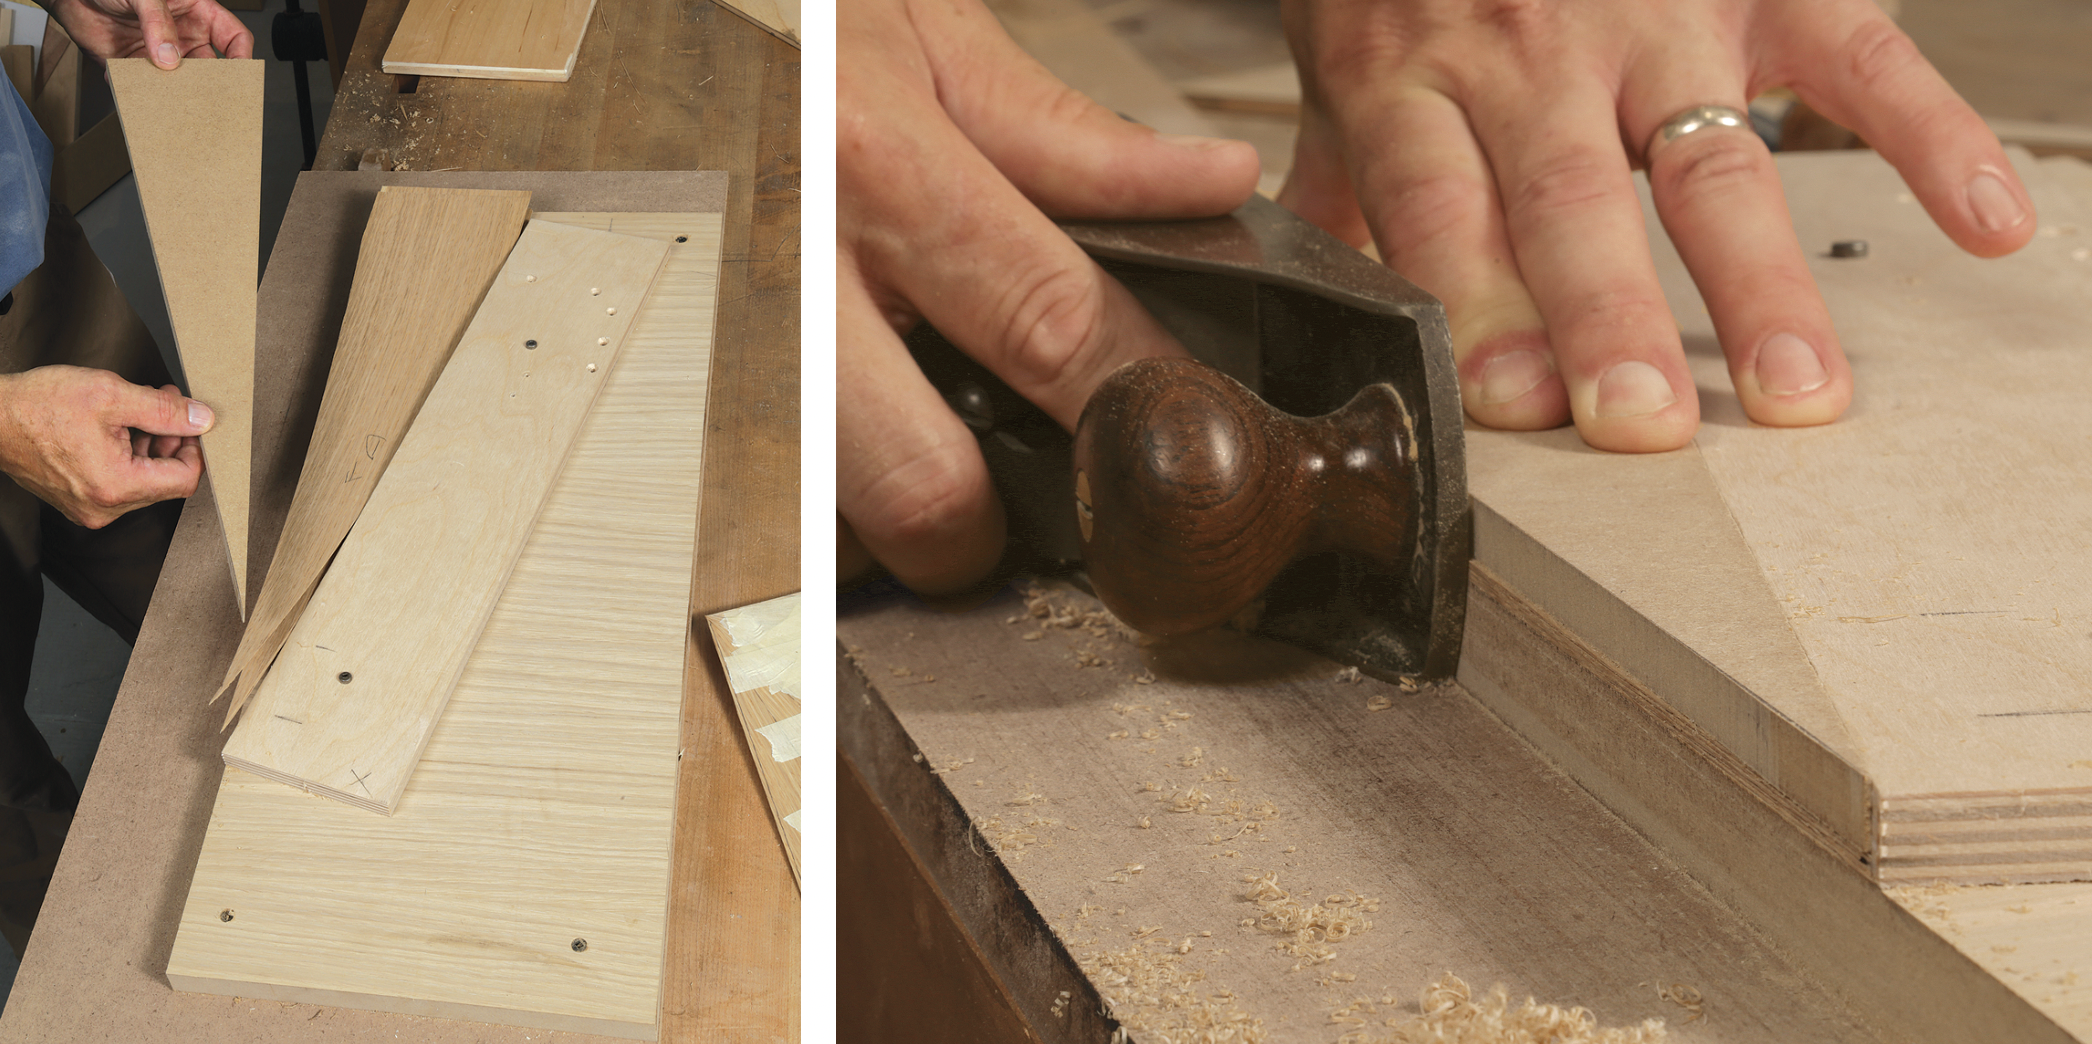
|

Tape the veneer twice
With the items reduce out, joint their edges and assemble them into half circles. I joint them utilizing a handplane and a devoted taking pictures board that has a fence screwed down on the angle of the segments.
To create the half circles, first use masking tape to connect the segments on their again faces. Later you’ll add correct veneer tape to the entrance, however the masking tape holds the meeting collectively till then. Stretch the masking tape over the joints to maintain the seams closed. Earlier than taping the 2 half circles collectively, noticed off any additional from every semicircle and joint their mating edges. Add masking tape to the again while you’re completed to finish the circle.
 From Nice Woodworking #297
To view your entire article, please click on the View PDF button under.
Obtain FREE PDF
[ad_2]