


[ad_1]

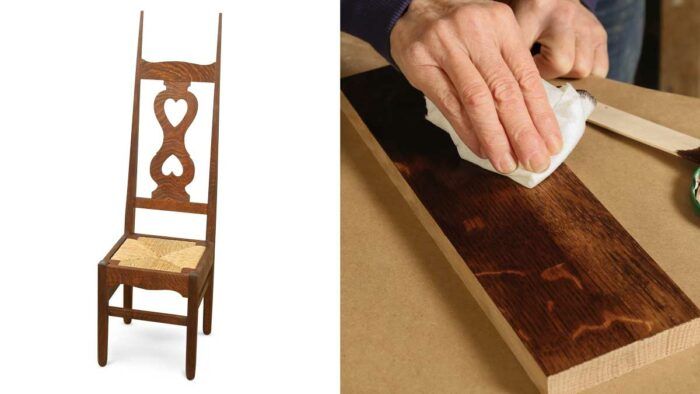
Synopsis: Although not the end meant by C.F.A. Voysey when he designed his two-heart chair, this wealthy, dark-brown end is the one usually discovered whenever you see this Arts and Crafts chair in collections. So when Nancy Hiller made the chair for an upcoming article, she used this end. It requires a three-step coloring system to get its heat, layered look.
In 1898, when British architect C.F.A. Voysey designed his two-heart chair, he specified that it needs to be “made in oak and left fairly free from stain or polish.” This route for the end was not relegated to a footnote, however handwritten in capitals on the prime of the drawing.
As anybody who does customized design or builds to order will know, prospects usually have their very own agendas. That is what number of examples of the chair got here to have a darkish end, lengthy related to wooden species akin to mahogany that have been thought-about “greater high quality” than English oak. Such sleight of hand was inconsistent with the fundamental values of the Arts and Crafts motion, which emphasised honesty (for instance, by uncovered joinery) and inspired folks to ask themselves simply why they attributed greater high quality to issues that weren’t home-grown or home made, which implicitly disparaged the easy, native, and never contrived.
In 2017, once I went to England with the first aim of measuring certainly one of these chairs at The Wilson (previously the Cheltenham Museum), the one I hung out with was darkish. I don’t know the actual ending supplies or processes used on that chair, however it was a wealthy, heat darkish brown; like a bit of black gown, the darkness performed tips on the attention, making the chair appear extra delicate and spindly than it seems to be when completed to Voysey’s specs.
I’ve completed most of my chairs solely with linseed oil, however for an article I ready for an upcoming challenge, the editors and I made a decision to paint the chair darkish. I exploit a three-step coloring system to get a heat, layered depth of end typical of turn-of-the-century furnishings and millwork—in different phrases, precisely the sort of end Voysey didn’t need for his two-heart chair.
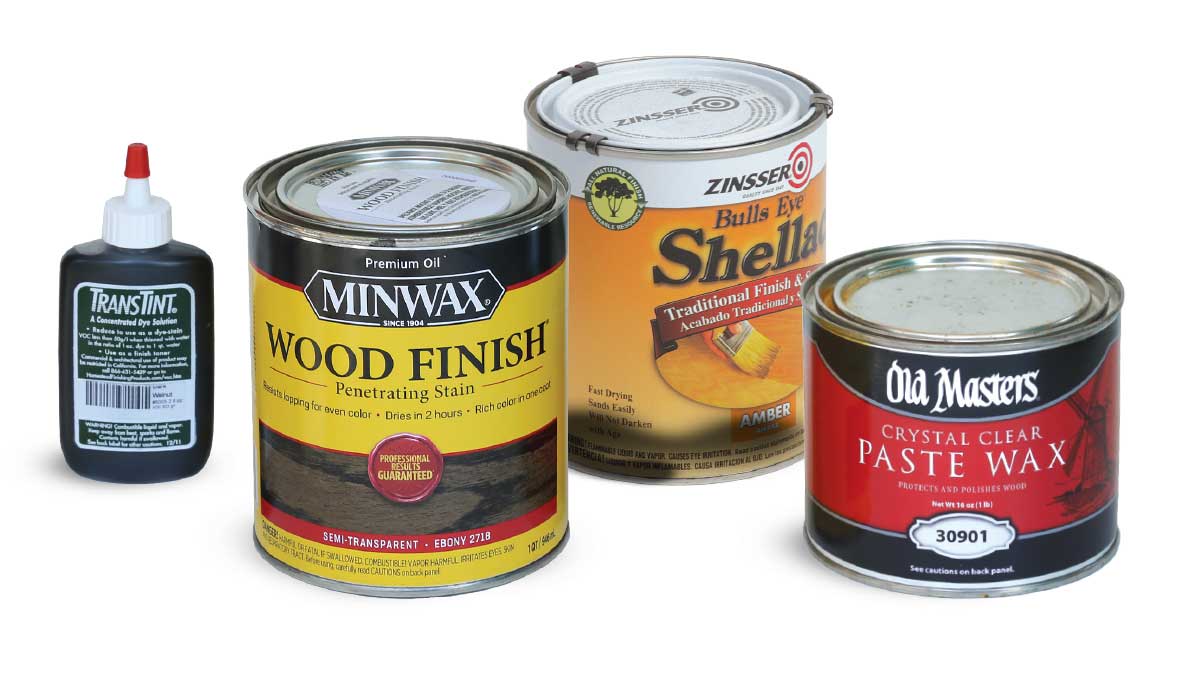
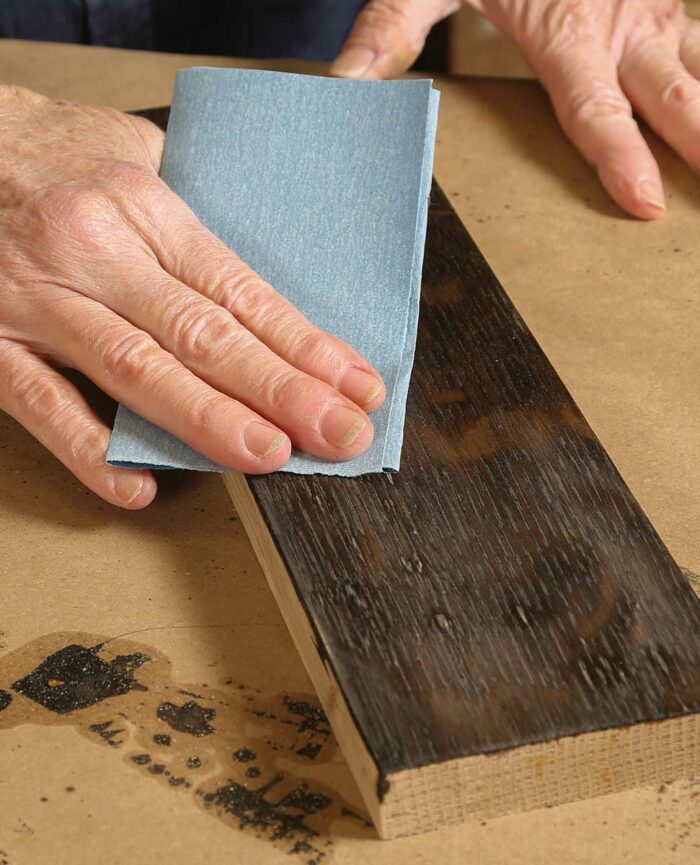
Start by sanding the oak to 180 grit. Take away all mud, utilizing a vacuum with a brush attachment, compressed air, or each. Elevate the grain with a calmly dampened fabric. Let it dry, then sand once more. Then transfer by dye, stain, shellac, and at last wax.
A layered end
First add coloration with a dye. Then improve that coloration and produce out the wooden’s character with a stain. Subsequent, seal all that in with an amber shellac that warms the colour on the similar time. And eventually, add a layer of paste wax to guard all of it. |

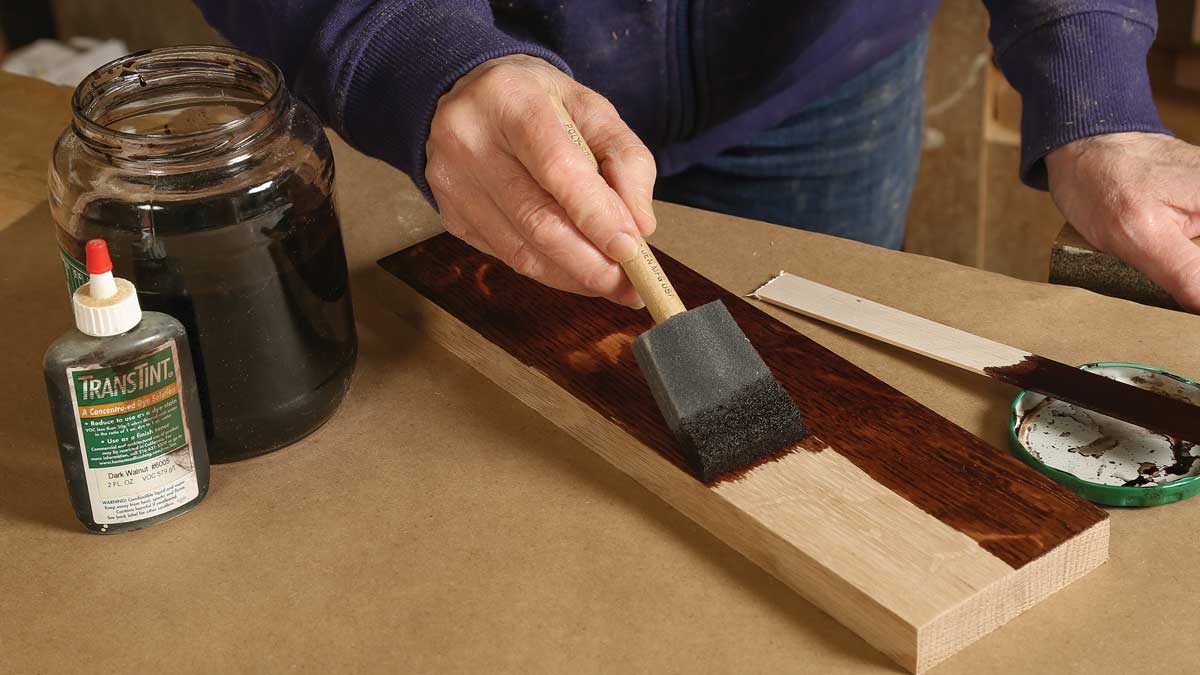
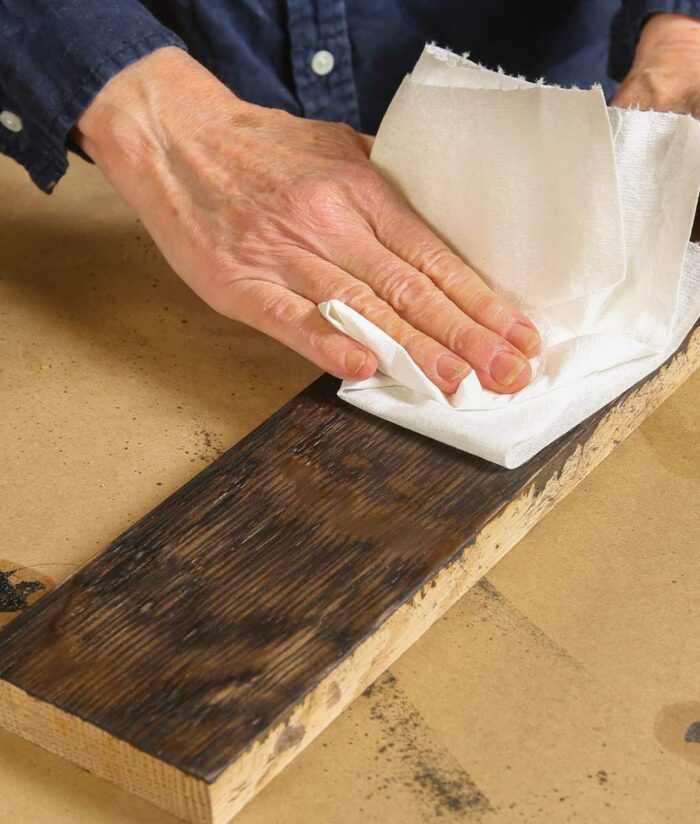
Increase coloration and grain
Beginning with a dye as a substitute of stain pops the grain. The dye darkens uniformly, coloring the medullary rays together with the remainder of the wooden.


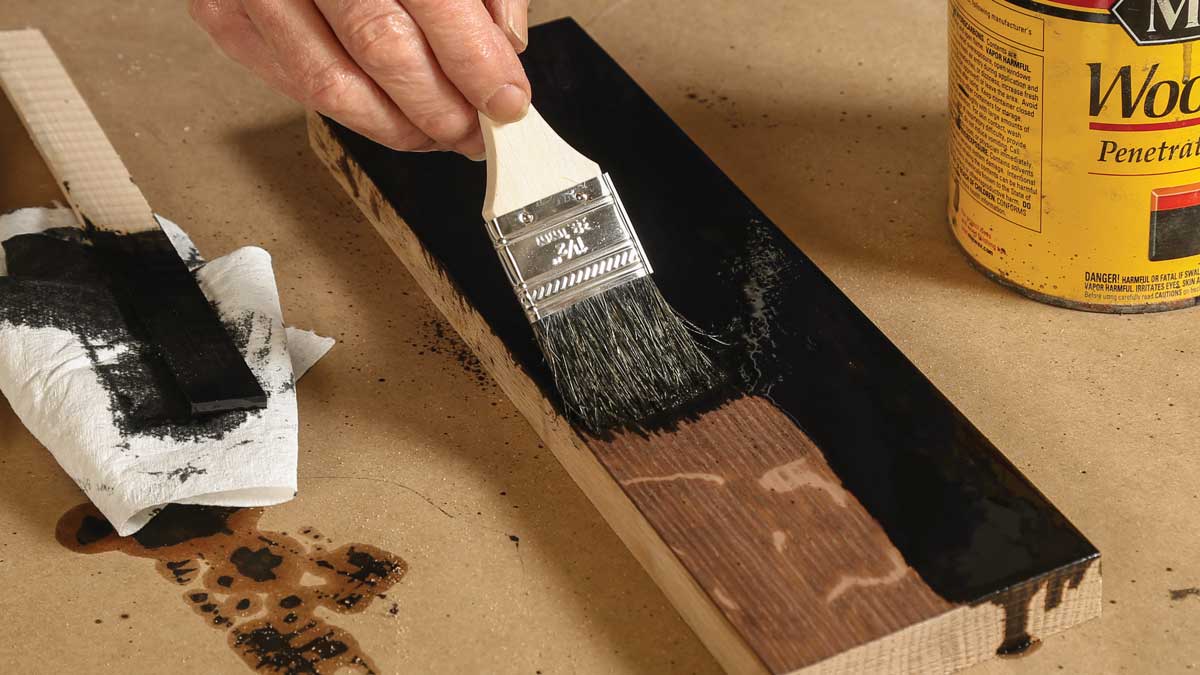
Spherical out the colour with stain
Staining over the dye provides coloration and dimension, and additional defines the grain. As a result of the oil-based stain is not going to coloration the medullary rays, utilizing it after the dye makes the now-dyed rays stand out much more.


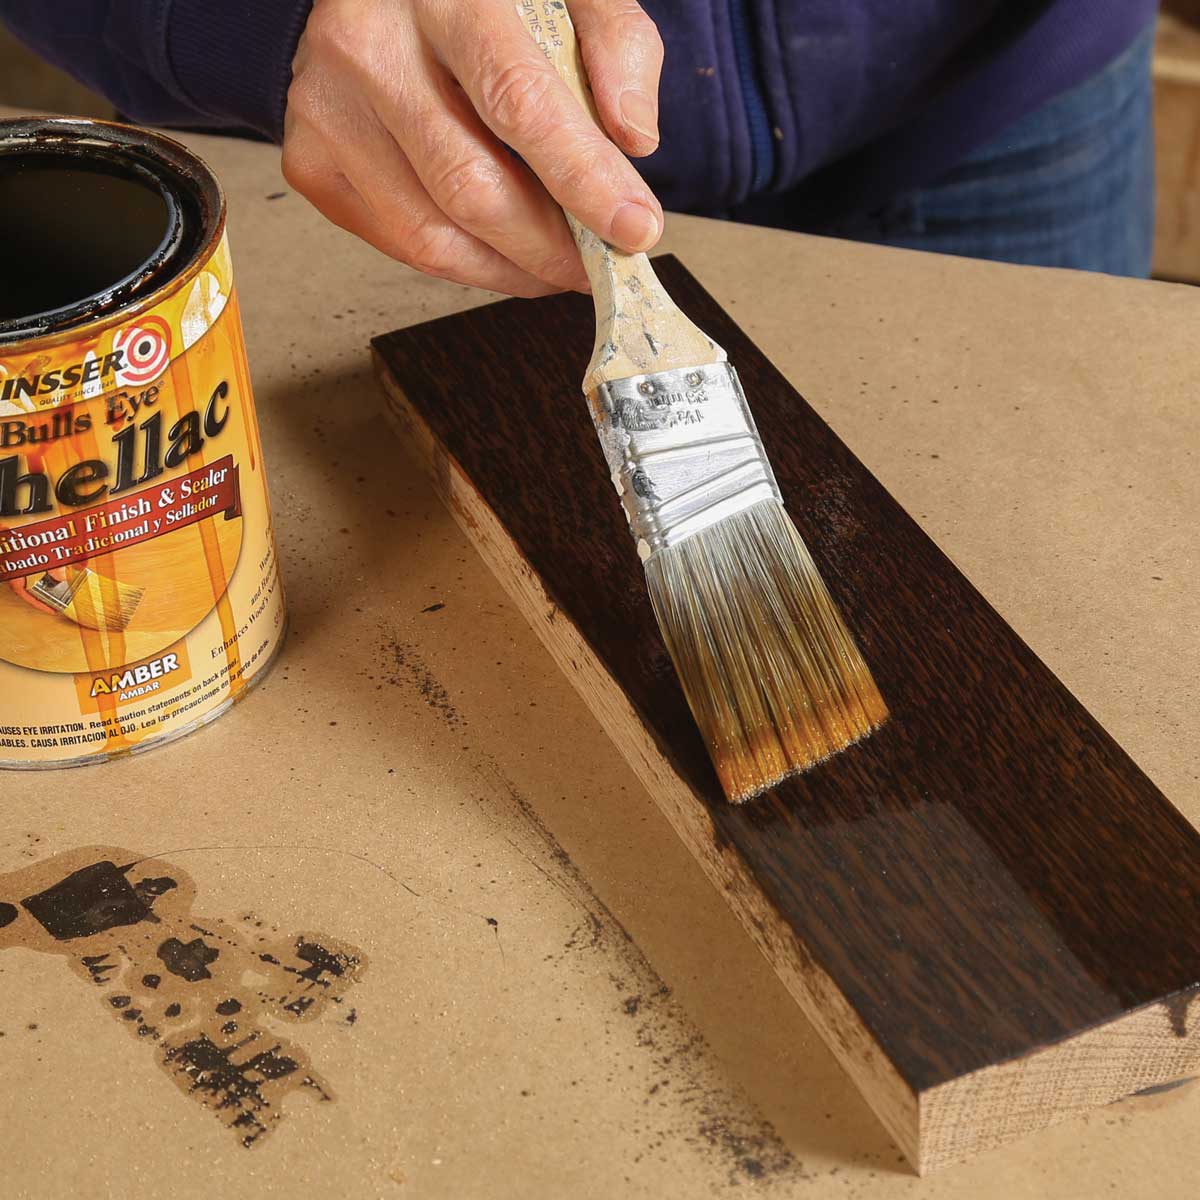
Seal and defend
Amber shellac brightens every little thing whereas including a sheer layer of coloration, in addition to a protecting topcoat. One coat is sufficient. Hiller isn’t searching for a built-up end, however a protecting layer of brightness and heat.


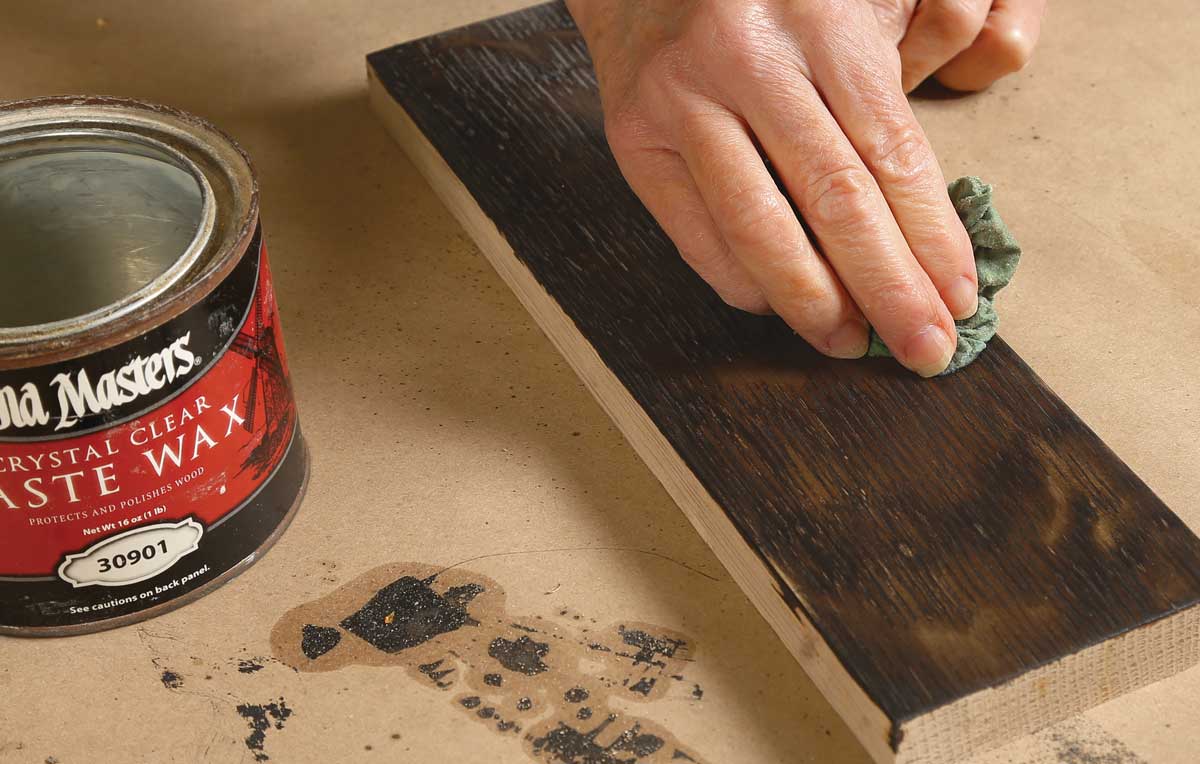
Add additional safety
Paste wax dries to a tough however very skinny end, giving added safety and a silky smoothness to the contact.


From High-quality Woodworking #298
To view the whole article, please click on the View PDF button beneath.
Obtain FREE PDF
[ad_2]